Huge thanks to everyone who uses, supports, and/or contributes to flutter_map in any way, you've helped make the most popular non-commercially aimed mapping solution for Flutter!
In particular, thanks go to:
All the current maintainers:
@ibrierley
@JaffaKetchup
@mootw (previously @MooNag)
@TesteurManiak
@josxha
All the previous maintainers:
John P Ryan - the original founder of this project, over at AppTree Software
@kengu
The authors of this documentation:
@JaffaKetchup
Anyone who has contributed to making flutter_map:
Anyone who has made plugins for flutter_map:
Anyone who has donated to flutter_map:
Supporters
Please consider donating to keep this project going! We're extremely grateful all donations of any size. They keep us going and will allow us to cover any unforeseen or future costs, and potentially open up more doors and opportunities in future!
We'll donate 15% of what we receive to the OpenStreetMap Foundation, as a thanks for their excellent work. The remainder goes directly to improving flutter_map.
Enter a nickname to be listed below in , and enter your Discord username to be granted the "Supporter" role on our server and gain access to a special supporter-only chat channel. These benefits last indefinitely (but may take 48 hours to grant, as this is done manually).
(Donation links appear below)
Raster vs Vector Tiles
There are 2 main types of tiles a server can serve: raster and vector; each has their own advantages and drawbacks. This page is designed to help you choose a type for your app, and help you use vector tiles if you choose to.
Raster tiles are the 'older' type of tile, and are raster images (usually .png or .jpg). These tiles are good because they can render quickly and easily, can be viewed without special software, and are readily available from most mapping services. As such, this makes them the popular choice for beginners.
However, raster tiles cannot be easily themed: a theme needs a whole new set of map tiles. This makes apps using light and dark themes have mismatching maps. As well as this, raster tiles usually have larger file sizes meaning slower download times, and they can become blurred/pixelated when viewed at a larger scale: a problem for users when zooming between zoom levels. Another issue is that shapes/text inside tiles cannot be rotated, hence the name 'static tiles': therefore, rotating the map will not rotate the name of a road, for example.
Vector tiles can be considered the 'newer' standard. These images might contain a specialised format (such as .pbf) dictating the mathematics and coordinates used to draw lines and shapes. Because these tiles are drawn at render time instead of at request/server time, theming can be used to make the map fit in better with an app's theme. The math-based image means that the images/tiles can be scaled without any loss of clarity.
v7 Information
Programmatic Interaction
There's two ways to interact with the map - that is to control it, as well as receive data from it - and it's current viewport, aka. 'camera'.
via User Gestures
The first way is through user interaction, where they perform gestures (such as drags/pans), and the map reacts automatically to those gestures to change the camera view of the map.
These are usually restricted by Options. It is possible to disable all input, either by disabling all gestures, or by wrapping the map with something like IgnorePointer.
via Programmatic Interation
However, the map camera can also be controlled by calling methods on a controller, and its state read by getting values from an exposed camera.
Changing the state of MapOptions.initial* will not update the map camera. It may only be updated through a MapController.
Huge thanks to all our past supporters, you help keep this project going. In no particular order, thanks to:
androidseb
Roundtrip
corepuncher
Maxi
V3ntus
OCELL
ishcherbina
... and everyone else who donated anonymously
Support Us
We'd love it if you could help keep our payment processing fees low! Stripe has a complex payment fee structure, but by avoiding more mainstream donation collection platforms, we can keep most of your donation.
Of course, please choose whatever is most convienient and safe for you - we're really thankful for anything you can spare. Card and Google/Apple Pay options are always available, and are quick and easy!
If you live in the UK, please use the GBP link and pay via Bacs Direct Debit if that isn't a problem.
If you live in the EU/Eurozone:
If you live in the Netherlands and have an iDEAL compatible bank account, please select the EUR link and use iDEAL to pay if that suits you
If you don't mind using SEPA Direct Debit, please use the EUR link
Otherwise, please consider paying in GBP
If you live in the US, please consider using ACH/bank account methods via the USD link, otherwise, please consider paying in GBP.
If you live elsewhere, please consider paying in GBP.
Note that paying in a currency different to your own may incur conversion fees and international transaction fees set by your banking provider.
If you would like to donate a larger amount, offer a bounty, or setup recurring donations, please get in touch! Also check out if you'd like to get some advertising space for your project.
As any donated money is not being exchanged for goods, and we are not a registered business, refunds are not given (although they may be given in exceptional circumstances at our discretion).
We use Stripe for payments, analytics, and other business services. Stripe may collect personal data including via cookies and similar technologies. The personal data Stripe collects may include transactional data and identifying information about devices that connect to its services. Stripe uses this information to operate and improve the services it provides to us, including for fraud detection, loss prevention, authentication, and analytics related to the performance of its services. You can learn more about Stripe and read its privacy policy at https://stripe.com/privacy.
However it does add complexity to the rendering process as each element needs to be parsed and painted individually, meaning an impact to performance. Text elements and certain shapes can also be rotated (unlike raster tiles) to match the user's orientation, not the orientation of the map; but calculating this rotation needs to be done every frame, meaning an even larger impact on performance.
Due to the complications mentioned above, 'flutter_map' does not natively support vector tiles. However, vector tiles can be used with a community maintained plugin (vector_map_tiles) to do this.
It is important to note that 'flutter_map' only supports raster tiles natively. Vector tiles can be used with a community maintained plugin.
This is described in more detail at the bottom of this page.
Raster Tiles
Vector Tiles
Using Vector Tiles
Worried about vector tiles performance?
Using vector tiles may significantly cut FPS and introduce jank, and that's because of the amount of UI work that must be performed on the main thread.
The community and FM maintainers are looking to improve the situation!
Keep up to date and subscribe to the issue: .
v7 should be a pain free upgrade! Although some breaking changes have been made, most applications shouldn't see any effects or need to make any changes in their code.
For this reason, we have not included migration instructions. If you run into a specific issue, please get in touch on the Discord server, where we'll be happy to help you migrate!
This update has resolved our oldest open issue: #385! We now support hit detection/interactivity on the PolygonLayer, PolylineLayer, and CircleLayer. For more information, check out Layer Interactivity.
Additionally, we've been focusing hard on performance improvements, and we've added (in collaboration with the excellent open source community) two stress testing pages to the example application, so you can really strain FM to see how it handles huge datasets. Check out the performance sections of the Polygon Layer and Polyline Layer for more information.
The last major change is the introduction of StrokePattern: we now support solid, dashed, and dotted lines in all sorts of different arrangements and configurations - again thanks to our community! See for more details.
For a curated list of changes, check out our changelog. Alternatively, for a full breakdown, check out the releases and commits on our GitHub repository.
v7 supports Flutter 3.22. However, if performing the upgrade to v7 is prohibitive for whatever reason (such as waiting for dependencies to upgrade), but you would like to use Flutter 3.22, we've also released v6.2.1.
v6.2.1 only contains the necessary changes on top of v6.1.0 to support Flutter 3.22, and so we recommend upgrading to v7 to experience all the new functionality and fixes!
Start by adding some Layers to children, then configure the map in Options. Additionally, if required, add a MapController: Controllers & Cameras.
Placement Recommendations
It is recommended to make the map as large as possible, to allow it to display a lot of useful information easily.
As such, we recommend using a depth-based layout (eg. using Stacks) instead of a flat-based layout (eg. using Columns). The following 3rd party packages might help with creating a modern design:
If you must restrict the widget's size, you won't find a height or width property. Instead, use a SizedBox or Column/Row & Expanded.
If the map is displayed lazily in something like a PageView, changing the page and unloading the map will cause it to reset to its .
To prevent this, set MapOptions.keepAlivetrue, which will activate an internal AutomaticKeepAliveClientMixin. This will retain the internal state container in memory, even when it would otherwise be disposed.
Interaction Options
The InteractionOptions object passed to MapOptions.interactiveOptions configures the gestures that the user can use to interact with the map. For example, disable rotation or configure cursor/keyboard rotation.
Flags
flags is a bitfield that enables and disables the vast majority of gestures. Although technically the type is of int, it is usually set with a combination of InteractiveFlags.
Note that some gestures must be configured by other means, either instead of using flags, or in addition to.
By default, all gestures are enabled, but a non-interactive map can be created using none (and other options in addition).
Otherwise, to set flags, there's two methods:
Add flags, with the bitwise 'OR' (|) operator in-between
For example, InteractiveFlag.drag | InteractiveFlag.rotate
Remove flags from all, using the & and ~ operators in-between
For example, InteractiveFlag.all & ~InteractiveFlag.rotate
Cursor/keyboard rotation is designed for desktop platforms, and allows the cursor to be used to set the rotation of the map whilst a (customizable) keyboard key (by default, any of the 'Control' keys) is held down.
The CursorKeyboardRotationOptions object passed to the property with the corresponding name configures this behaviour. The CursorKeyboardRotationOptions.disabled() constructor can be used to disable cursor/keyboard rotation.
There's many customization options, see the API docs for more information:
Examples
flutter_map provides an example application showcasing much of its functionality. In some cases, the example app contains undocumented functionality, so it's definitely worth checking out!
Live Web Demo
Note that the web demo is built automatically from the , so may not reflect the the latest release on pub.dev.
Please don't abuse the web demo! It runs on limited bandwidth and won't hold up to thousands of loads.
If you're going to be straining the application, please see , and serve the application yourself.
Prebuilt Artifacts
If you can't build from source for your platform, our GitHub Actions CI system compiles the example app to GitHub Artifacts for Windows, Web, and Android.
The Windows and Android artifacts just require unzipping and installing the .exe or .apk found inside.
The Web artifact requires unzipping and serving, as it contains more than one unbundled file. You may be able to use dhttpd for this purpose.
Note that these artifacts are built automatically from the , so may not reflect the the latest release on pub.dev.
Build From Source
If you need to use the example app on another platform, you can build from source, using the 'example' directory of the repository.
Using Lima Labs
'flutter_map' is in no way associated or related with Lima Labs.
Lima Labs' home page:
Lima Labs' pricing page:
If you're looking for extremely low cost & often free (even for commercial usage), but still reliable, and low frills service, Lima Labs provides high quality raster tiles with one style based off the standard CARTO style.
Sign up for an account - Lima Labs operates manual verification, so you may have to wait a few days
'flutter_map' is in no way associated or related with Thunderforest (or Gravitystorm Limited).
Thunderstorm's home page:
Thunderstorm's pricing page:
Thunderstorm's documentation page:
Thunderforest is a popular tiered-payment (with free tier) tile provider solution, especially for generic mapping applications. Note that using 'flutter_map' uses up your 'Map Tiles API' requests.
Using Google Maps
'flutter_map' is in no way associated or related with Google Maps
Google Maps' home page:
Google Maps' pricing page:
Google Maps' documentation page:
Raster 2D tiles from Google Maps is a relatively new offering, which makes Google Maps directly compatible with flutter_map, whilst abiding by the Google Maps' ToS (which the previous method did not).
Tile providers that also provide their own SDK solution to display tiles will often charge a higher price to use 3rd party libraries like flutter_map to display their tiles. Just another reason to switch to an alternative provider.
To display map tiles from Google Maps, a little more effort is needed, as they require a complex session token system.
Therefore, we haven't yet constructed a full guide, so please read the Google Developers documentation for more info:
Using Tracestrack
'flutter_map' is in no way associated or related with Tracestrack.
Tracestrack's home page:
Tracestrack has a wide variety of raster styles, including topographic and standard bases, in multiple different color schemes (light & dark). It also supports vector tiles, which makes it super flexible - use raster tiles now, and be ready to switch to vector tiles!
Copy the URL template from the result box at the bottom and paste it into your TileLayer
WMS Usage
flutter_map supports WMS tile servers through WMSTileLayerOptions - wmsOptions in TileLayers.
For usage, please refer to the Full API Reference, and the examples in the example app.
Omit urlTemplate if using WMS tiles. The template is now specified in the baseUrl property of WMSTileLayerOptions.
flutter_map
A versatile mapping package for Flutter. Simple and easy to learn, yet completely customizable and configurable, it's the best choice for mapping in your Flutter app.
Setting up an interactive and compliant map is simpler than making your lunch-time coffee! It can be accomplished in just under 30 lines and a minute or two to install.
This code snippet demonstrates everything you need for a simple map (in under 30 lines!), but of course, FM is capable of much more than just this, and you could find yourself lost in the many options available and possibilities opened!
Not quite sure about something? No worries, we're here to help!
Listen To Events
When the state of a MapCamera changes, because of an update to its position or zoom, for example, a MapEvent, which can be handled by you.
There's two methods to catch all emitted MapEvents. These methods expose the raw MapEvent, and is recommended in cases where multiple events need to be caught, or there's no more specific callback method available in MapOptions (see ).
Layers
To display anything on the map, you'll need to include at least one layer. This is usually a , which displays the map tiles themselves: without it, the map isn't really a very good map!
To insert a layer, add it to the children property. Other layers (sometimes referred to as 'feature layers', as they are map features) can then be stacked on top, where the last widget in the children list is topmost. For example, you might display a , or any widget as your own custom layer ()!
Each layer is isolated from the other layers, and so handles its own independent logic and handling. However, they can access and modify the internal state of the map, as well as respond to changes.
Most layers are 'mobile', such as the
Controllers & Cameras
flutter_map makes use of InheritedModel to share 3 'aspects' with its built children:
MapController: use to programatically control the map camera & access some helper functionality - control camera
MapCamera: use to read the current state/position of the map camera & access some helper functionality that depends on the camera (such as
Overlay Image Layer
You can overlay images on the map (for example, town or floor plans) using OverlayImageLayer and OverlayImages or RotatedOverlayImages.
RotatedOverlayImage supports rotation and parallelogram skewing, by accepting 3 points instead of 2.
To calculate a rotation without skewing, given a center and a 3rd corner, see .
Hit Testing Behaviour
The behaviour of hit testing can be confusing at first. These rules define how hit testing usually behaves:
Gesture callbacks in MapOptions are always invoked, no matter what is within the layers or the result of hitTests in those layers, with the exception of custom defined hit test behaviours (not those layers that support interactivity, see ), such as applying GestureDetectors around Marker.children
Using Stadia Maps
To display their map tiles, Stadia Maps usually provides a 'Static Maps Base URL' for map styles. However, to integrate with 3rd-party APIs, they also provide a 'Raster XYZ PNGs URL' , and tiles requested through this endpoint consume 'Styled Raster Map Tiles' credits. This URL needs no extra configuration to integrate with flutter_map.
Retina tiles (high-DPI) tiles are available. Use the URLs containing '@2x' instead of '{r}'. The maximum zoom level that Stadia Maps supports is 20, so it is recommended to set maxNativeZoom or maxZoom as such.
Stadia Maps offers a variety of ready-made map styles that don't require customization. URLs are found with the style: see the available . The URL should be used as above.
Stadia Maps' also provides vector tiles. For more information about using vector tiles, please see .
Circle Layer
You can add circle areas to maps by making them out of a center coordinate and radius using CircleLayer and CircleMarkers.
CircleLayers and CircleMarkers support hit detection and interactivity.
Hit testing is always* performed on the interactable layers (see Layer Interactivity) even if they have not been set-up for interactivity: hit testing != interactivity
Non-interactable layers (such as Overlay Image Layer) have no defined hitTest, and behaviour is situation dependent
A successful hit test (true) from an interactable layer will prevent hit testing on layers below it in the children stack
To change this behviour, make use of these three widgets, wrapping them around layers when and as necessary:
TranslucentPointer: a general purpose 'widget' included with flutter_map that allows the child to hit test as normal, but also allows widgets beneath it to hit test as normal, both seperately
For example, a marker with a GestureDetector child that detects taps beneath a Polyline will not detect a tap, no matter if the PolylineLayer has a defined hitNotifier or the Polyline has a defined hitValue. A defined onTap callback in MapOptions would be called however. If the Marker were no longer obscured by the Polyline, it's onTap callback would be fired instead of the one defined in MapOptions.
However, this behaviour could be changed by wrapping the PolylineLayer with a TranslucentPointer. This would allow interacitivity to function as normal, but also allow the Marker beneath to have it's onTap callback fired. Further wrapping another TransclucentPointer around the MarkerLayer would allow all 3 detections to function.
GestureDetectors absorb hit tests, and so corresponding callbacks in MapOptions will not be invoked if they are defined/invoked in the GestureDetector.
However, please note that this method of integration is still experimental. Many of the Stadia Maps styles utilize advanced features of the Mapbox GL JSON style language which are not yet well-supported.
'flutter_map' is in no way associated or related with Stadia Maps.
If you've made your own plugin that you're willing to share, please let us know in the #plugins channel on the flutter_map Discord server. We can then add it to the Plugins List. We're always looking forward to see what you've made!
When submitting a plugin, please ensure the plugin:
preferably includes 'flutter_map_' in the name, by convention
is preferably available via a standard pub.dev package installation
includes good documentation (at least to setup basic functionality), and a code example
Check the FAQs below, and double check the documentation
Then, for bug reports & feature requests: check for previous issues, then ask in GitHub Issues
We're a community maintained project and the maintainers would greatly appriciate any help in implementing features and fixing bugs! Feel free to jump in: .
Please remember that we are volunteers and cannot gurantee support. The standard Code of Conduct is here to keep our community a safe and friendly place for everyone: .
FAQs
How can I use a custom map style?
How can I prevent POI/labels rotating when the map rotates?
How can I remove certain POI/labels from the map?
Unfortunately, this library cannot provide this functionality. It has no control over the tiles displayed in the TileLayer. This is a limitation of the technology, not this library.
This is because raster tiles are just images generated by a 3rd party tile server (dictated by your URL template), and therefore cannot be changed by the library that displays the tiles. Filters can be applied to the entire tile, such as an emulated dark mode, but these effects do not look great.
However, tilesets can be styled. This is the most effective way of using custom styles. These methods may help you with this:
How can I route a user between two locations?
Why does the Polyline only go in a straight line between two points?
See .
How can I add a Marker where the user's location is?
How can I center the map on the user's location?
This is beyond the scope of flutter_map. However, you can use the to do this.
Alternatively, use the 'location' and 'compass' packages to generate a stream of the user's location and heading, and feed that to a Marker using a StreamBuilder.
Why don't any map tiles appear?
If no tiles are appearing (if tiles are appearing on some zoom levels but not others, see below), try performing the following debugging steps:
Is the templateUrl or WMS configuration correct (to the best of your knowledge)?
Why does the map disappear/go grey when I zoom in far?
Why does the map stop zooming in even though I know there are more zoom levels?
If tiles are disappearing when you zoom in, the default grey background of the FlutterMap widget will shine through. This usually means that the tile server doesn't support these higher zoom levels.
If you know that there are more tiles available further zoomed in, but flutter_map isn't showing them and scaling a particular zoom level instead, it's likely because the TileLayer.maxNativeZoom property is set too low (it defaults to 19).
To set/change the zoom level at which FM starts scaling tiles, change the
How can I make the map 3D, or view it as a globe?
Unfortunately, this isn't supported, partially due to lack of time on the maintainer's part to implement this feature, partially due to technical limitations. PRs are welcome!
Listening to a MapController's mapEventStream, which exposes events via a Stream
Specifying a callback method in MapOptions.onMapEvent
If only a couple of events need to be caught, such as just an onTap handler, it is possible to avoid handling the raw Stream of MapEvents. Instead, MapOptions has callbacks available for the following events:
The MapEventTap event may be emitted (or the onTap callback called) 250ms after the actual tap occurred, as this is the acceptable delay between the two taps in a double tap zoom gesture.
If this causes noticeable jank or a bad experience (for example, on desktop platforms), disable .doubleTapZoom:
This disables the double tap handler, so the MapEventTap
TileLayer
. These use a
MobileLayerTransformer
widget internally, which enables the layer to properly move and rotate with the map's current camera.
However, some layers are 'static', such as the AttributionLayers. These aren't designed to move nor rotate with the map, and usually make use of a widget like Align and/or SizedBox.expand to achieve this.
Both of these layer types are defined in the same children list. Most of the time, static layers go atop mobile layers, so should be at the end of the list.
Some layers - such as PolygonLayer - take 'elements' - such as Polygons - as an argument, which are then displayed by the layer. They are usually displayed bottom-to-top in the order of the list (like a Stack).
Some layers that use elements also support interactivity via hit testing. This is described in more detail on another page:
It is possible to add more than one TileLayer! Transparency in one layer will reveal the layers underneath.
Example FlutterMap widget, containing multiple feature layers, atop a TileLayer
Layers With Elements
Since v7, it has not been possible to add elements to layers in an imperative style.
Flutter is a framework: the UI is a function of the state. It is not necessarily the state's job to change the UI, the state just requests the UI rebuild itself using the new state. Since v7, FM also now mostly follows this convention (although with the exception of the MapController, which is a special exception to this rule).
This means that code such as MarkerLayer.children.add(newElement) is invalid.
All 3 aspects can be retrieved from within the context of a FlutterMap, which all built descendants should have access to. This usually means from within a layer: anywhere where there is at least one 'visible' builder method between the FlutterMap and the invocation.
Use the static of (or null-safe maybeOf) method to access the inherited aspect. For example, to access the MapCamera:
This will attach the widget to the state of the map, causing it to rebuild whenever the depended-on aspects change. See 2. Hooking Into Inherited State for more information.
Then use the camera getter on the MapController instance.
For more information about correctly setting up an external(ly accessible) MapController, see:
final inheritedCamera = MapCamera.of(context);
MapOptions is also an aspect, which reflects the MapOptions defined on the FlutterMap.options parameter.
However, it is mostly irrelevant, except for when .
Accessing Aspects Within Descendants
Using this method directly in the children list (not inside another widget), and in any MapOptions callback, is not possible: there is no* builder method between the FlutterMap and the children or callback.
Instead, follow , or, wrap the necessary layers with a Builder widget.
For example, the code snippet below hides a
Accessing Aspects Elsewhere
MapCamera
Avoid using this method to access the camera when MapCamera.of() is available.
MapController
MapOptions
It is not possible to access the MapOptions in this way outside of FlutterMap descendants.
This is because it is not changed by FlutterMap, and so that would be unnecessary.
There have been issues in the past where these images failed to appear properly, sometimes not showing up at all, sometimes showing up malformed or corrupted.
If this issue occurs to you, and you're using Impeller, try disabling Impeller at launch/build time to see if the issue rectifies itself. If it does, this is an Impeller issue, and should be reported to the Flutter team.
We support Wasm! and benefit from potentially improved performance when the browser can handle Wasm.
CORS
On the web platform, CORS restrictions designed to protect resources on websites and control where they can be loaded from. Some tile servers may not be intended for external consumption, or may be incorrectly configured, which could prevent tiles from loading. If tiles load correctly on platforms other than the web, then this is likely the cause.
See the Flutter documentation for more details. We load images using a standard Image widget.
Android
flutter_map needs to access the Internet to load tiles, in most cases. On Android, apps must include the INTERNET permission in their manifest. Add the following line to all manifests:
flutter_map needs to access the Internet to load tiles, in most cases. On MacOS, apps must include a dedicated entitlement. Add the following lines to 'macos/Runner/DebugProfile.entitlements' and 'macos/Runner/Release.entitlements':
After installing the package, import it into the necessary files in your project:
Marker Layer
You can add single point features - such as pins, labels, or markers - to maps using MarkerLayer and Markers.
No more image only markers! 😉, we allow usage of any widget as the marker.
Excessive use of markers may create performance issues.
Consider using a clustering plugin to merge nearby markers together, reducing the work that needs to be done when rendering: .
Alignment
The marker widget will be centered over the geographic coordinate by default. However, this can be changed with the alignment argument, which aligns the widget relative to the point.
The center of rotation when rotate is true will be the point.
The default alignment for all Markers within a MarkerLayer can be set by changing the same property on the MarkerLayer.
It is possible to enable the Marker to automatically counter-rotate to the camera's rotation, to ensure it remains facing upwards, via the rotate argument.
The default alignment for all Markers within a MarkerLayer can be set by changing the same property on the MarkerLayer.
There is no built-in support to handle gestures on Markers, such as taps. However, this is easy to implement using a standard GestureDetector.
Creating New Layers
Creating a new map layer is a great way to achieve a more custom, performant, map design. For example, it might be used to display a scale bar, or overlay a grid.
Check the for layers that already implement the behaviour you wish to replicate.
1. Creating A Layer Widget
It starts with a normal StatelessWidget or StatefulWidget, which then starts its widget tree with a widget dependent on whether the layer is designed to be either 'mobile' or 'static', depending on the purpose of the layer. For more information, see Mobile vs Static Layers.
classCustomMobileLayerextendsStatelessWidget {
classCustomStaticLayerextendsStatelessWidget {
2. Hooking Into Inherited State
Then, there are three possible methods that could be used to retrieve separate 'aspects' of the state of the map.
Calling these inside a build method will also cause the layer to rebuild automatically when the depended-on aspects change.
Other Options
Other Servers
There are plenty of other tile servers you can choose from, free or paid. Most provide a static tile service/API, usually called Static Tiles or just Tile Requests (if no vector tiles are supported).
If you're responsible for a tile server, and want to have your tile server and setup instructions listed in this documentation, please get in touch!
A good catalogue of servers (usually called Providers elsewhere) can be found at the websites below:
Serving Your Own Tiles
Switch2OSM also provides detailed instructions on how to serve your own tiles: this can be surprisingly economical and enjoyable if you don't mind a few hours in a Linux console.
However, this will require a very high-spec computer, especially for larger areas, and hosting this might be more complicated than it's worth. It's very difficult to fully understand the technologies involved.
Why Choose flutter_map?
We think flutter_map hits the spot for many Flutter apps. Find out why!
Options
To dictate & restrict what the map can and should do, regardless of its contents, it needs some guidance!
It provides options that can be categorized into three main parts:
Defines the location of the map when it is first loaded
Defines restrictions that last throughout the map's lifetime
Custom CRSs
To define a Proj4Crs (custom CRS) you have to register a projection of proj4.Projection. For that you must import proj4dart library as follows:
You can create and register your custom projection in multiple ways, but the recommended is to use a Proj4 definition string from . For example for EPSG:3413 (WGS 84 / NSIDC Sea Ice Polar Stereographic North) you can find it . This is how a Proj4 definition string looks like:
With this Proj4 definition string and a string identifier register your proj4.Projection like this:
External Custom Controllers
For more information about what a MapController is, and when it is necessary to set one up in this way, see:
The FlutterMap.controller parameter takes an externally intialised MapController instance, and attaches it to the map.
It is not safe to assume that the MapController is ready to use as soon as an instance has been initialised, for example within initState.
It must first be attached to the FlutterMap
Attribution Layer
Before publishing your app to users, you should credit any sources you use, according to their Terms of Service.
There are two built in methods to provide attribution, RichAttributionWidget and SimpleAttributionWidget, but you can also build your own using a simple Align widget.
An animated, interactive attribution layer that supports both logos/images (displayed permanently) and text (displayed in a popup controlled by an icon button adjacent to the logos).
It is heavily customizable (in both animation and contents), and designed to easily meet the needs of most ToSs out of the box.
Instead, in this case, a list of the coordinates (and any extra information required to build each Marker) should be maintained, then this list used to build a list of Markers at build time, for example, by using List.map directly in the MarkerLayer.children argument.
You must comply with the appropriate restrictions and terms of service set by your tile server. Failure to do so may lead to any punishment, at the tile server's discretion.
This library and/or the creator(s) are not responsible for any violations you make using this package.
The OpenStreetMap Tile Server (as used in this documentation) ToS can be found here. Other servers may have different terms.
You can use your previously registered proj4.Projection to create a custom CRS of type Proj4Crs. You can use the following parameters:
<String>code (required): string identifier for the selected CRS, e.g. EPSG:3413
<proj4.Projection>proj4Projection (required): the proj4.Projection object you wish to use
<Bounds>bounds: bounds of the CRS in projected coordinates
<List<double>>resolutions: an array of zoom factors (projection units per pixel, eg. meters/pixel)
<List<double>>scales: scale factors (pixels per projection unit); specify either scales or resolutions, but not both!
<List<Point>>origins: tile origin in projected coordinates (for TileLayer). Why is it needed? GeoServer by default can define different origins (top left coordinates) for each zoom levels. In case of origin mismatch the tile will be drawn on the wrong place: the map will jump at such zoom levels. If your origins vary with zoom levels the number of origins must match the number of resolutions. You can get the desired origins from a GetCapabilities WMTS call from geoserver e.g. http://[ip:port]/geoserver/gwc/service/wmts?request=GetCapabilities. This results an XML, and you have to look up for the TopLeftCorners for each TileMatrix of your TileMatrixSet.
<Transformation>transformation: the transformation to use when transforming projected coordinates into pixel coordinates
An example:
Proj4Crs has multiple uses:
Set FlutterMap's default CRS:
Set a WMS layer's CRS
For complete code (with point transformation from one projection to another) see the page source code. This is how it looks like:
You may wish to use a commercial service like Mapbox Studio, which allows you to style multiple tilesets. See Using Mapbox.
Alternatively, you can experiment with vector tiles. These are not pre-rendered, and so allow any style you desire to be applied on the fly. See Vector Tiles.
Your last option is to serve tiles yourself. See Other Options.
Have you followed the platform specific setup (Additional Setup) instructions (if applicable for your platform)?
Check the Network tab either in Flutter DevTools or the browser DevTools to see why/if the tile requests are failing.
If none of those solved the issue, check if there are any widgets covering the map, or any errors in the console (particularly in release mode)?
TileLayer.maxNativeZoom
property. To set/change the max zoom level that can actually be zoomed to (hard limit), use
Event handling
Defines methods that are called on specific map events
One part of MapOptions responsibilities is to define how the map should be positioned when first loaded. There's two ways to do this (that are incompatible):
initialCenter (LatLng) & initialZoom
initialCameraFit
by bounds (circumscribed): CameraFit.bounds
by bounds (inscribed): CameraFit.insideBounds
by coordinates (circumscribed): CameraFit.coordinates
It is possible to also set the map's initialRotation in degrees, if you don't want it North (0°) facing initially.
If rotation is enabled/allowed, if using initialCameraFit, prefer defining it by coordinates for a more intended/tight fit.
One part of MapOptions responsibilities is to define the restrictions and limitations of the map and what users can/cannot do with it.
Some of the options are described elsewhere in this documentation, in context. In addition, the API docs show all the available options, and below is a partial list of options:
cameraConstraint
camera bounds inside bounds: CameraConstraint.bounds
camera center inside bounds: CameraConstraint.center
Changing these properties after the map has already been built for the first time will have no effect: they only apply on initialisation.
To control the map programatically, use a MapController: .
Permanent Rules
Instead of maxZoom (or in addition to), consider setting maxNativeZoom per TileLayer instead, to allow tiles to scale (and lose quality) on the final zoom level, instead of setting a hard limit.
, which could take up to multiple frames to occur (similar to the way a
ScrollController
is attached to a scrollable view). It helps to avoid errors by thinking of the controller in this way.
For example, it is sometimes necessary to use a controller in the initState() method (for example to attach an event listener). However, because this method executes before the widget has been built, a controller defined here will not be ready for use.
Instead, use the MapOptions.onMapReady callback. At this point, it is guaranteed that the controller will have been attached. You could also use this method to complete a Completer (and await its Future elsewhere) if you need to use it elsewhere.
Instead, some extra care should be taken, which may feel a little backwards at first. The state model should be used AFTER the normal setup.
Setup the controller as in Basic Setup, where the MapController is defined & initialised directly adjacent to the FlutterMap
In your state model, create a nullable (and initially uninitialised) MapController containing field
It may then be beneficial to unset the state model field when the controller is disposed: it should be disposed when the FlutterMap is disposed, which should occur just before the widget building the FlutterMap is disposed. Therefore, you can override the dispose method.
final mapController = MapController();

@override
void initState() {
    // Cannot use `mapController` safely here
}

@override
Widget build(BuildContext context) {
    return FlutterMap(
        mapController: mapController,
        options: MapOptions(
            onMapReady: () {
                mapController.mapEventStream.listen((evt) {}); // for example
                // Any* other `MapController` dependent methods
            },
        ),
    );
}
Use of the MapController before it has been attached to a FlutterMap will result in an error being thrown, usually a LateInitialisationError.
It is usually safe to use a controller from within a callback manually initiated by the user without further complications.
MapController methods that change the position of the map should not be used directly (not as a result of another callback) in onMapReady - see . This is an unsupported and usually unnecessary usecase.
Usage Within A State System/Model
Don't define/intialise the a MapController within a class or widget that doesn't also contain the FlutterMap, such as a state model (eg. ChangeNotifier), then try to use it by querying the state in the FlutterMap.controller parameter.
Animation
For more information about configuration and all the many options this supports, see the in-code API documentation.
We also provide a more 'classic' styled box, similar to those found on many web maps. These are less customizable, but might be preferred over RichAttributionWidget for maps with limited interactivity.
SimpleAttributionWidget, as in the example app
children: [
  RichAttributionWidget(
    animationConfig: const ScaleRAWA(), // Or `FadeRAWA` as is default
    attributions: [
      TextSourceAttribution(
        'OpenStreetMap contributors',
        onTap: () => launchUrl(Uri.parse('https://openstreetmap.org/copyright')),
      ),
    ],
  ),
],
You must comply with the appropriate restrictions and terms of service set by your tile server. Failure to do so may lead to any punishment, at the tile server's discretion.
This library and/or the creator(s) are not responsible for any violations you make using this package.
The OpenStreetMap Tile Server (as used above) ToS can befound here. Other servers may have different terms.
Please consider crediting flutter_map. It helps us to gain more awareness, which helps make this project better for everyone!
RichAttributionWidget
Closed RichAttributionWidget
Opened RichAttributionWidget, as in the example app
There is no built-in support to rotate markers to a specific degree. However, this is easy to implement through a rotating widget, such as Transform.rotate.
If you're looking for vector tiles, we don't currently support them natively. We only support raster tiles at the moment.
However, options are available, and the community and us are looking into improving support in the future!
Independent Works
Don't just take it from us - see how others view flutter_map!
These show our many strengths, and some things you may want to stick with the standard commercial SDKs for (vector tiles, essentially)😄
Project Showcase
These great projects all make use of flutter_map!
But there's more: check out the dependents list on GitHub, and the #showcase channel for more projects on our Discord server.
Non-OSS Sponsors
OSS and/or Non-Profit Projects
🗺️ No more vendor lock-in: better flexibility, quality, and price
We natively support any static raster* tiles! Bring your own tilesfrom your own server, the user's device, a tile container, or another externally-operated tile server. Use any service, but always be free to change to get the best fit, quality, and price.
Still want to use those familiar maps? Consider great quality and better priced alternatives, or use the more mainstream Google Maps or Mapbox Maps with flutter_map*.
💪 Stress free setup & easy to use
Migrating from a commercial library (such as Google Maps) has never been easier! No more complex platform-specific setup, no more difficult API keys: just add a widget, bring some tiles, and you're done. Check out our to see just how simple it is.
Our great documentation and community support makes it easy to setup and customize fast and keeps you moving if you need some more detailed help.
🧩 Wide ecosystem of plugins
A huge community of developers maintain an ecosystem of plugins for you to supercharge flutter_map with.
➕ Customize and expand endlessly
Add interactive and highly customizable polygons, polylines, and markers (which support widget children) to your map easily and quickly. And because we're 100% Flutter, it's easy to add your own stuff on top without messing around in platform views.
Map Marker
Your places organizer
Your advert here!
Want to advertise your project here? For more information, and to apply, please see:
(it's free!)
Every Door
Open Source100% Non-Profit
The most efficient OpenStreetMap editor for surveying shops and benches
Ente Photos
Open Source
End-to-end encrypted alternative to Google Photos
🇳🇱 Stichting Zeilvaart Warmond (Track & Trace)
100% Non-Profit
Follow participating ships during the race, and use the replay function after the race to analyse the performance
Your advert here!
Want to advertise your project here? For more information, and to apply, please see:
(it's free!)
Tile Providers
The tileProvider parameter in TileLayer takes a TileProvider object specifying a tile provider to use for that layer.
This has a default of NetworkTileProvider which gets tiles from the internet through a dedicated image provider.
There's two situations in which you'll need to change the tile provider:
Sourcing tiles from the filesystem or asset store:
Using a that instructs you to do so ()
These tile providers use the urlTemplate to get the appropriate tile from the a network, usually the World Wide Web.
The underlying custom ImageProviders will cache tiles in memory, so that they do not require another request to the tile server if they are pruned then re-loaded. This should result in them being loaded quicker, as well as enabling already loaded tiles to appear even without Internet connection (at least in the same session).
This is the default tile provider, and does nothing particularly special. It takes two arguments, but you'll usually never need to specify them:
httpClient: BaseClient
By default, a RetryClient backed by a standard Client is used
headers: Map<String, String>
By default, only headers sent by the platform are included with each request, plus an overridden (where possible) 'User-Agent' header based on the
Tiles that are removed/pruned before they are fully loaded do not need to complete (down)loading, and therefore do not need to complete the HTTP interaction. Cancelling these unnecessary tile requests early could:
Reduce tile loading durations (particularly on the web)
Reduce users' (cellular) data and cache space consumption
Reduce costly tile requests to tile servers*
This provider uses '', which supports aborting unnecessary HTTP requests in-flight, after they have already been sent.
Although HTTP request abortion is supported on all platforms, it is especially useful on the web - and therefore recommended for web apps. This is because the web platform has a limited number of simulatous HTTP requests, and so closing the requests allows new requests to be made for new tiles.
On other platforms, the other benefits may still occur, but may not be as visible as on the web.
Once HTTP request abortion is , NetworkTileProvider will be updated to take advantage of it, replacing and deprecating this provider. This tile provider is currently a separate package and not the default due to the reliance on the additional Dio dependency.
These tile providers use the urlTemplate to get the appropriate tile from the asset store of the application, or from a file on the users device, respectively.
This tile providers uses the templateUrl to get the appropriate tile from the asset store of the application.
This tile providers uses the templateUrl to get the appropriate tile from the a path/directory/file on the user's device - either internal application storage or external storage.
Offline Mapping
Using maps without an Internet connection is common requirement. Luckily, there are a few options available to you to implement offline mapping in your app.
Caching
Automatically store tiles as the user loads them through interacting with the map, usually on a temporary basis
Bulk downloading
Download an entire area/region of tiles in one shot, ready for a known no-Internet situation
Provide a set of pre-determined tiles to all users through app assets or the filesystem
Caching is used usually to improve user experience by reducing network waiting times, not necessarily to prepare for no-Internet situations. Caching can be more temporary (eg. in-memory/session-only, where the cache is cleared after the app is closed), or more long-term (eg. app cache, where the OS takes responsibility for clearing the app cache when necessary/when requested).
There's 3 methods that basic caching can be implemented in your app, two of which rely on community maintained plugins:
(lightweight and MIT licensed)
(also includes , but GPL licensed)
Custom implementation, via a and ImageProvider (either custom or via a package such as )
Bulk downloading is used to prepare for known no-Internet situations by downloading map tiles, then serving these from local storage.
Bulk downloading is more complex than , especially for regions that are a non-rectangular shape. Implementing this can be very time consuming and prone to issues.
The includes advanced bulk downloading functionality, of multiple different region shapes, and other functionality. It is however GPL licensed. To help choose whether FMTC or DIY is more appropriate for your use case, please see:
If you have a set of custom raster tiles that you need to provide to all your users, you may want to consider bundling them together, to make a them easier to deploy to your users. Bundles can be provided in two formats.
Container formats, such as the traditional MBTiles, or the more recent PMTiles, store tiles usually in a database or binary internal format.
These require a special parser to read on demand, usually provided as a TileProvider by a plugin. The following community-maintained plugins are available to read these formats:
: (when using vector tiles)
: ( when using vector tiles, also works in online contexts)
When uncontained, tiles are usually in a tree structure formed by directories, usually 'zoom/x/y.png'. These don't require special parsing, and can be provided directly to the TileLayer using one of the built-in local TileProviders.
You can ship an entire tile tree as part of your application bundle, and register it as assets in your app's pubspec.yaml.
This means that they will be downloaded together with your application, keeping setup simple, but at the expense of a larger application bundle size.
This allows for more flexibility: you could store a tile tree on a remote server, then download the entire tree later to the device's filesystem, perhaps after intial setup, or just an area that the user has selected.
This means that the setup may be more complicated for users, and it introduces a potentially long-running blocking action, but the application's bundle size will be much smaller.
Using Mapbox
'flutter_map' is in no way associated or related with Mapbox.
Tile providers that also provide their own SDK solution to display tiles will often charge a higher price to use 3rd party libraries like flutter_map to display their tiles. Just another reason to switch to an alternative provider.
To display their map tiles, Mapbox usually provides a 'Style URL' for map styles. However, to integrate with 3rd-party APIs, they also provide a 'CARTO Integration URL', and tiles requested through this endpoint consume the 'Static Tiles API' quota. This URL needs no extra configuration to integrate with flutter_map.
Integration
Custom Styles
Mapbox supports creating and using custom styled maps through Studio.
Before attempting to use your style, ensure it actually has layers, and not just a Basemap, which will not appear in the tiles. The image below shows a style which will not work. If you only see blank tiles, but no errors, this is likely the cause.
To create a new style based on the Standard style, choose a template when creating the new style.
Create a custom style using the editor
Click "Share...", or the share icon
Choose between Draft or Production
Scroll to the bottom of the dialog, and choose Third Party
Select "CARTO" from the dropdown menu
Click the copy button to copy the template URL, then paste it into your TileLayer
The URL includes an '@2x' string, which forces usage of high-definition tiles on all displays, without extra setup.
Should you need to let flutter_map interfere, and only use retina tiles on retina/high-density displays, replace it with the '{r}' placeholder, then see for more information.
The maximum zoom level that Mapbox supports is 22, so it is recommended to set maxNativeZoom or maxZoom as such.
Mapbox offers a variety of ready-made map styles that don't require customization. An example URL can be found in .
This URL should be used as above, although you may need to insert the placeholders manually.
How Does It Work?
Interactive maps are often formed from multiple layers of data, which can be panned (moved), rotated, and sometimes tilted/pitched, based on the user's gesture input, or another programmatic control.
One type of layer included on every map is known as a tile layer, which displays tiles, square segments of a map.
When multiple tiles, which are each the same dimensions, are laid out around each other, they give the illusion of one continuous map.
Tiles can be referenced/identified in a few different ways, such as:
Layer Interactivity
The following layers are interactable - they have specialised hitTesters and support external hit detection:
Creating New Tile Providers
One common requirement is a custom TileProvider, and potentially a custom ImageProvider inside. This will allow your plugin to intercept all tile requests made by a map, and take your own action(s), before finally returning a tile.
To create your own usable TileProvider, the first step is making a class that extends the abstract class, and adding a constructor.
The constructor should accept an argument of super.headers, without a constant default.
Unexpected error with integration github-files: Integration is not installed on this space
TileProviders must implement a method to return an ImageProvider (the image of a tile), given its coordinates and the TileLayer it is used within.
There's two methods that could be called by flutter_map internals to retrieve a tile: getImage or getImageWithCancelLoadingSupport.
Prefer overriding getImageWithCancelLoadingSupport for TileProviders that can cancel the loading of a tile in-flight, if the tile is pruned before it is fully loaded. An example of a provider that may be able to do this is one that makes HTTP requests, as HTTP requests can be aborted on the web (although Dart does not 'natively' support it yet, so a library such as Dio is necessary). Otherwise, getImage must be overridden.
In addition to the coordinates and TileLayer, the method also takes a Future<void> that is completed when the tile is pruned. It should be listened to for completion (for example, with then), then used to trigger the cancellation.
Some custom TileProviders may want to change the way URLs are generated for tiles, given a coordinate.
It's possible to override:
how the urlTemplate's placeholders are populated: populateTemplatePlaceholders
the values used to populate those placeholders: generateReplacementMap
the generation method itself: getTileUrl and/or getTileFallbackUrl
Check the Plugins List for providers that already implement the behaviour you wish to replicate.
1. Extending TileProvider
If using an object that needs closing/cancelling, such as an HttpClient, override the dispose method.
2. Setup Tile Retrieval
It is best to put as much logic as possible into a custom ImageProvider, to avoid blocking the main thread.
If developing a plugin, you may wish to adjust the 'User-Agent' header has been to further differentiate your plugin's traffic from vanilla 'flutter_map' traffic.
(Optionally) Override URL Generation
Avoid overriding the generation method itself, as it is not usually necessary.
class CustomTileProvider extends TileProvider {
    CustomTileProvider({
        // Suitably initialise your own custom properties
        super.headers, // Accept a `Map` of custom HTTP headers
    })
}
property
Improve performance by reducing CPU and IO work
Network Tile Providers
Specifying any fallbackUrl (even if it is not used) in the TileLayer will prevent loaded tiles from being cached in memory.
This is to avoid issues where the urlTemplate is flaky (sometimes works, sometimes doesn't), to prevent potentially different tilesets being displayed at the same time.
This plugin is part of the official 'flutter_map' organisation, and maintained by the same maintainers.
Local Tile Providers
Specifying any fallbackUrl (even if it is not used) in the TileLayer will reduce the performance of these providers.
It will cause 23% slower asset tile requests with AssetTileProvider, and will cause main thread blocking when requesting tiles from FileTileProvider.
AssetTileProvider
Asset management in Flutter leaves a lot to be desired! Unfortunately, every single sub-directory (to the level of tiles) must be listed.
FileTileProvider
On the web, FileTileProvider() will throw an UnsupportedError when a tile request is attempted, due to the lack of the web platform's access to the local filesystem.
If you know you are running on the web platform, use a NetworkTileProvider or a custom tile provider.
Raster
Each tile is a normal pre-rendered standard image, such as JPG or PNG
Vector
Each tile is a special format containing the data for the tile, and is then rendered by the end library
This library/documentation focuses on maps accessible via the Slippy Map Convention, although all are supported.
This library only supports raster tiles. See Raster vs Vector Tiles for more information.
Slippy map tiles are accessed by 3 coordinates, x/y/z.
X & Y coordinates correspond to all the latitudes and longitudes contained within that tile, however they are not actual longitude and latitude. For example, geographic coordinate (61.127, -0.123) might be in the tile (128983, 430239).
The Z value represents the current zoom level, where one tile (0/0/0) covers the entire planet with extremely low detail at level 0, to level 20 (although some tile servers will support even higher zoom levels) where over 1 trillion tiles are required to cover the entire surface of the Earth.
Tiles, especially raster tiles, take a lot of computing power and time to generate, because of the massive scale of all the input and output data. Therefore, most tiles are sourced externally, from an online tile server (either publicly or by users holding an API key), or sometimes from the local filesystem or asset store of the app.
A tile provider (within flutter_map) is responsible for:
Constructing the path/URL to a tile, when given its coordinates (x/y/z): Slippy Map Convention
Using an ImageProvider or other mechanism to fetch that tile: Sourcing Tiles
Performing any other processing steps, such as caching
But don't worry! flutter_map (or a plugin) creates a provider for you, so for most use cases and tile sources, you shouldn't need to handle this yourself!
If you don't know about standard map things, such as the latitude/longitude system and projections, you should probably read about these first!
For more information about the Slippy Map Convention, visit .
Sourcing Tiles
Unlike commercial SDKs you may be more familiar with, we don't have an opinion on which tiles you should use, and you'll need to bring your own instead :)
Tile Providers
This can be quite confusing for newcomers!
Within this library, 'tile providers' use 'tile servers' to retrieve tiles from the Internet. On the other hand, 'tile servers' and external sites usually use 'tile providers' to mean 'tile servers'!
These all follow roughly the same pattern to setup hit detection/interactivity, and there's three or four easy steps to setting it up.
Pass a LayerHitNotifier to the hitNotifier parameter of the layer. The LayerHitNotifier should be created as a ValueNotifier defaulting to null, but strongly typed to LayerHitNotifier.
This notifier will be notified whenever a hit test occurs on the layer, with a LayerHitResult when an element (such as a Polyline or Polygon) within the layer is hit, and with null when an element is not hit (but the layer is).
It is possible to listen to the notifier directly with addListener, if you want to handle all hit events (including, for example, hover events).
However, most use cases just need to handle particular gestures (such as taps). This can be done with a wrapper widget to 'filter' the events appropriately: 3. Gesture Detection.
To identify which particular element was hit (which will be useful when handling the hit events in later steps), supported elements have a hitValue property.
This can be set to any object, but if one layer contains all the same type, type casting can be avoided (if the type is also specified in the LayerHitNotifier's type argument).
To only handle certain hits based on the type of gesture the user performed (such as a tap), wrap the layer with a gesture/hit responsive widget, such as GestureDetector or MouseRegion.
These widgets are smart enough to delegate whether they detect a hit (and therefore whether they can detect a gesture) to the child - although HitTestBehavior.deferToChild may be required for some widgets to enable this functionality.
This means the layer can report whether it had any form of hit, and the handler widget can detect whether the gesture performed on it actually triggered a hit on the layer below.
Once a LayerHitResult object is obtained, through the hit notifier, you can retrieve:
hitValues: the hitValues of all elements that were hit, ordered by their corresponding element, first-to-last, visually top-to-bottom
coordinate: the geographic coordinate of the hit location (which may not lie on any element)
point: the screen point of the hit location
Because the HitNotifier is a special type of ValueNotifier, it can be both listened to (like a Stream), and its value instantly retrieved (like a normal variable).
Therefore, there are two ways to retrieve a LayerHitResult (or null) from the notifier:
Using .value to instantly retrieve the value
This is usually done within a gesture handler, such as GestureDetector.onTap, as demonstrated below.
Adding a listener (.addListener) to retrieve all hit results
This is useful where you want to apply some custom/advanced filtering to the values, and is not a typical usecase.
Layer interactivity is different to map interactivity. See Interaction Options to control map interactivity.
For information about how hit testing behaves in flutter_map, see Hit Testing Behaviour.
It is important to note that hit testing != interactivity, and hit testing is always executed on interactable layers by default.
final LayerHitNotifier hitNotifier = ValueNotifier(null);

// Inside the map build...
PolylineLayer( // Or any other supported layer
  hitNotifier: hitNotifier,
  polylines: [], // Or any other supported elements
);
// Inside the map build...
MouseRegion(
  hitTestBehavior: HitTestBehavior.deferToChild,
  cursor: SystemMouseCursors.click, // Use a special cursor to indicate interactivity
  child: GestureDetector(
    onTap: () {
      // Handle the hit, which in this case is a tap
      // For example, see the example in Hit Handling (below)
    },
    // And/or any other gesture callback
    child: PolylineLayer(
      hitNotifier: hitNotifier,
      // ...
    ),
  ),
),
// Inside a gesture detector/handler

final LayerHitResult? hitResult = hitNotifier.value;
if (hitResult == null) return;

// If running frequently (such as on a hover handler), and heavy work or state changes are performed here, store each result so it can be compared to the newest result, then avoid work if they are equal

for (final hitValue in hitResult.hitValues) {}
1. Attach A Hit Notifier
Direct callbacks, such as onTap,aren't provided on layers or individual elements, to maximize flexibility.
2. Add hitValue To Elements
The equality of the element depends on the equality of the hitValue.
Therefore, any object passed to the hitValue should have a valid and useful equality method.
Objects such as do this behind the scenes, and can be a good choice to store small amounts of uncomplicated data alongside the element.
3. Gesture Detection
4. Hit Handling
If all the hitValues in a layer are of the same type, and the created hit notifier specifies that type in the type argument, typing is preserved all the way to retrieval.
Caching
flutter_map only provides caching in-memory. All cached tiles will be cleared after the app session is ended.
You must comply with the appropriate restrictions and terms of service set by your tile server. Always read the ToS before using a tile server. Failure to do so may lead to any punishment, at the tile server's discretion. Some tile servers may require longer-term caching to be implemented.
Bulk Downloading
You must comply with the appropriate restrictions and terms of service set by your tile server. Always read the ToS before using a tile server. Failure to do so may lead to any punishment, at the tile server's discretion. Many tile servers will forbid or restrict bulk downloading, as it places additional strain on their servers.
Bundled Map Tiles
Contained
Uncontained
AssetTileProvider
If using AssetTileProvider, every sub-directory of the tree must be listed seperately. See the example application's 'pubspec.yaml' for an example.
Polylines support a solid, dotted, and dashed style, through a StrokePatternpassed as an argument toPolyline.pattern. These are flexible, and spacing and sizing may be customized.
dotted and dashed patterns should 'fit' the Polyline they are applied to, otherwise the final point in that line may not be visually clear. The fit can be adjusted when defining the pattern through the PatternFit enum.
PolylineLayers and Polylines support hit detection and interactivity.
To improve performance, line segments that are entirely offscreen are effectively removed - they are not processed or painted/rendered. This is enabled by default and disabling it is not recommended.
To improve performance, polylines are 'simplified' before being culled and painted/rendered. The well-known is used to perform this, and is enabled by default.
Simplification algorithms reduce the number of points in each line by removing unnecessary points that are 'too close' to other points which create tiny line segements invisible to the eye. This reduces the number of draw calls and strain on the raster/render thread. This should have minimal negative visual impact (high quality), but should drastically improve performance.
For this reason, polylines can be more simplified at lower zoom levels (more zoomed out) and less simplified at higher zoom levels (more zoomed in), where the effect of culling on performance improves and trades-off. This is done by scaling the simplificationTolerance parameter (see below) automatically internally based on the zoom level.
To adjust the quality and performance of the simplification, the maximum distance between removable points can be adjusted through the simplificationTolerance parameter. Increasing this value (from its default of 0.4) results in a more jagged, less accurate (lower quality) simplification, with improved performance; and vice versa. Many applications use a value in the range 0 - 1.
To disable simplification, set simplificationTolerance to 0.
Routing is out of scope for 'flutter_map'. However, if you can get a list of coordinates from a 3rd party, then you can use polylines to show them!
Good open source options that can be self-hosted include (which includes a public demo server) and . You can also use a commercial solution such as Mapbox or Google Maps - these can often give more accurate/preferable results because they can use their traffic data when routing.
You may have a polyline with 'Google Polyline Encoding' (which is a lossy compression algorithm to convert coordinates into a string and back). These are often returned from routing engines, for example. In this case, you'll need to decode the polyline to the correct format first, before you can use it in a Polyline's points argument.
One way to accomplish this is to use another Flutter library called , together with a custom method. You can use the code snippet below, which can just be pasted into a file and imported whenever needed:
You can then use the package and the above snippet by doing:
flutter_map includes many performance optimizations built in, especially as of v7. Some are enabled by default, but may be only 'weakly' applied, and others must be enabled manually. There are also some other actions that can be taken externally to improve performance
The following list is ordered from least 'intrusive'/extreme, to most intrusive. Remember to consider the potential risks of enabling an optimization before doing so.
'flutter_map' doesn't provide any public methods to manipulate polygons, as these would be deemed out of scope.
However, some useful methods can be found in libraries such as 'latlong2' and . These can be applied to the input of Polygon's points argument, and the map will do it's best to try to render them. However, more complex polygons - such as those with holes - may be painted inaccurately, and may therefore require manual adjustment (of holePointsList, for example).
Using Bing Maps
'flutter_map' is in no way associated or related with Bing Maps.
Bing Maps' home page:
To display map tiles from Bing Maps, a little more effort is needed, as they use a RESTful API with quadkeys, rather than the standard slippy map system.
Luckily, we've constructed all the code you should need below! Feel free to copy and paste into your projects.
Thanks to for discovering the .
Attribution is not demonstrated here, but may be required. Ensure you comply with Bing Maps' ToS.
bing_maps.dart
// All compatible imagery sets
enum BingMapsImagerySet {
  road('RoadOnDemand', zoomBounds: (min: 0, max: 21)),
  aerial('Aerial', zoomBounds: (min: 0, max: 20)),
  aerialLabels('AerialWithLabelsOnDemand', zoomBounds: (min: 0, max: 20)),
  canvasDark('CanvasDark', zoomBounds: (min: 0, max: 21)),
  canvasLight('CanvasLight', zoomBounds: (min: 0, max: 21)),
  canvasGray('CanvasGray', zoomBounds: (min: 0, max: 21)),
  ordnanceSurvey('OrdnanceSurvey', zoomBounds: (min: 12, max: 17));

  final String urlValue;
  final ({int min, int max}) zoomBounds;

  const BingMapsImagerySet(this.urlValue, {required this.zoomBounds});
}

// Custom tile provider that contains the quadkeys logic
// Note that you can also extend from the CancellableNetworkTileProvider
class BingMapsTileProvider extends NetworkTileProvider {
  BingMapsTileProvider({super.headers});

  String _getQuadKey(int x, int y, int z) {
    final quadKey = StringBuffer();
    for (int i = z; i > 0; i--) {
      int digit = 0;
      final int mask = 1 << (i - 1);
      if ((x & mask) != 0) digit++;
      if ((y & mask) != 0) digit += 2;
      quadKey.write(digit);
    }
    return quadKey.toString();
  }

  @override
  Map<String, String> generateReplacementMap(
    String urlTemplate,
    TileCoordinates coordinates,
    TileLayer options,
  ) =>
      super.generateReplacementMap(urlTemplate, coordinates, options)
        ..addAll(
          {
            'culture': 'en-GB', // Or your culture value of choice
            'subdomain': options.subdomains[
                (coordinates.x + coordinates.y) % options.subdomains.length],
            'quadkey': _getQuadKey(coordinates.x, coordinates.y, coordinates.z),
          },
        );
}

// Custom `TileLayer` wrapper that can be inserted into a `FlutterMap`
class BingMapsTileLayer extends StatelessWidget {
  const BingMapsTileLayer({
    super.key,
    required this.apiKey,
    required this.imagerySet,
  });

  final String apiKey;
  final BingMapsImagerySet imagerySet;

  @override
  Widget build(BuildContext context) {
    return FutureBuilder(
      future: http.get(
        Uri.parse(
          'http://dev.virtualearth.net/REST/V1/Imagery/Metadata/${imagerySet.urlValue}?output=json&include=ImageryProviders&key=$apiKey',
        ),
      ),
      builder: (context, response) {
        if (response.data == null) return const Placeholder();

        return TileLayer(
          urlTemplate: (((((jsonDecode(response.data!.body)
                          as Map<String, dynamic>)['resourceSets']
                      as List<dynamic>)[0] as Map<String, dynamic>)['resources']
                  as List<dynamic>)[0] as Map<String, dynamic>)['imageUrl']
              as String,
          tileProvider: BingMapsTileProvider(),
          subdomains: const ['t0', 't1', 't2', 't3'],
          minNativeZoom: imagerySet.zoomBounds.min,
          maxNativeZoom: imagerySet.zoomBounds.max,
        );
      },
    );
  }
}
import 'package:latlong2/latlong.dart';
export 'package:google_polyline_algorithm/google_polyline_algorithm.dart'
    show decodePolyline;

extension PolylineExt on List<List<num>> {
  List<LatLng> unpackPolyline() =>
      map((p) => LatLng(p[0].toDouble(), p[1].toDouble())).toList();
}
import 'unpack_polyline.dart';

decodePolyline('<encoded-polyline>').unpackPolyline(); // Returns `List<LatLng>` for a map polyline
Interactivity
If any polylines are very thin, it is recommended for accessibility reasons to increase the size of the 'hitbox' (the area where a hit is detected on a polyline) to larger than the line itself in order to make it easier to tap/interact with the polyline.
The minimumHitbox argument adjusts the minimum size of the hitbox - the size of the hitbox will usually be the entire visual area/thickness of the polyline (and border), but will be no less than this value. It defaults to 10.
Performance Optimizations
The example application includes a stress test which generates a Polyline with 200,000 points.
Culling
Polylines that are particularly wide (due to their strokeWidth/borderStrokeWidth may be improperly culled if using the default configuration. This is because culling decisions are made on the 'infinitely thin line' joining the points, not the visible line, for performance reasons.
Therefore, the cullingMargin parameter is provided, which effectively increases the distance a segement needs to be from the viewport edges before it can be culled. Increase this value from its default if line segements are visibly disappearing unexpectedly.
Culling cannot be applied to polylines with a gradient fill, as this would cause inconsistent gradients.
These will be automatically internally excluded from culling: it is not necessary to disable it layer-wide - unless all polylines have gradient fills, in which case that may yield better performance.
Avoid using these if performance is of importance. Instead, try using multiple polylines with coarser color differences.
Simplification
The simplification step must run before culling, to avoid the polyline appearing to change when interacting with the map (due to the first and last points of the polyline changing, influencing the rest of the simplified points).
Therefore, reducing/disabling simplification will yield better performance on complex polylines that are out of the camera view (and therefore culled without requiring the potentially expensive simplification). However, using simplification will likely improve performance overall - it does this by reducing the load on the raster thread and slightly increasing the load on the UI/build/widget thread.
On layers with (many) only 'short' polylines (those with few points), disabling simplification may yield better performance.
Illustration of the 5 types of PatternFit applied to a dashedPolyline
From left to right: none, appendDot, extendFinalDash, scaleUp (default), scaleDown
The example application includes a stress test which loads multiple Polygons from a GeoJson file, with a total of 138,000 points.
Culling (enabled by default)
To improve performance, polygons that are entirely offscreen are effectively removed - they are not processed or painted/rendered. This is enabled by default, and may be disabled using the polygonCulling parameter, although this is not recommended.
Batching (enabled by default, but improvable with effort)
To improve performance, polygons that are similar in appearance, and borders that are similar in appearance, are drawn to the underlying canvas in batches, to reduce the number of draw calls. This cannot be disabled.
To further improve performance, consider defining all Polygonpoints in a clockwise order, and place similar appearance Polygons adjacent to each other in the polygons list (where elevation does not matter).
Overlapping colors that are not completely opaque will not recieve the 'darkening'/layering effect - the overlapping area will just be the single colour.
Simplification (enabled by default, adjustable)
To improve performance, polygon outlines (points) are 'simplified' before the polygons are culled and painted/rendered. The well-known Ramer–Douglas–Peucker algorithm is used to perform this, and is enabled by default.
To adjust the quality and performance of the simplification, the maximum distance between removable points can be adjusted through the simplificationTolerance parameter. Increasing this value (from its default of 0.5) results in a more jagged, less accurate (lower quality) simplification, with improved performance; and vice versa. Many applications use a value in the range 1 - 1.5. To disable simplification, set simplificationTolerance to 0.
Simplification algorithms reduce the number of points in each line by removing unnecessary points that are 'too close' to other points which create tiny line segements invisible to the eye. This reduces the number of draw calls and strain on the raster/render thread. This should have minimal negative visual impact (high quality), but should drastically improve performance.
For this reason, polygons can be more simplified at lower zoom levels (more zoomed out) and less simplified at higher zoom levels (more zoomed in), where the effect of culling on performance improves and trades-off. This is done by scaling the simplificationTolerance parameter (see below) automatically internally based on the zoom level.
On layers with (many) only small polygons (those with few points), disabling simplification may yield better performance.
Polygons may overlap after simplification when they did not before, and vice versa.
Performant Rendering, with drawVertices(disabled by default)
Polygons (and similar other features) are usually drawn directly onto a Canvas, using built-in methods such as drawPolygon and drawLine. However, these can be relatively slow, and will slow the raster thread when used at a large scale.
Therefore, to improve performance, it's possible to optionally set the useAltRendering flag on the PolygonLayer. This will use an alternative, specialised, rendering pathway, which may lead to an overall performance improvement, particularly at a large scale.
There's two main steps to this alternative rendering algorithm:
Cut each Polygon into multiple triangles through a process known as . flutter_map uses an earcutting algorithm through (a port of an algorithm initially developed at Mapbox intended for super-large scale triangulation).
Draw each triangle onto the canvas via the lower-level, faster method. Borders are then drawn as normal.
Self-intersecting (complex) Polygons are not supported by the triangulation algorithm, and could cause errors.
The Shamos-Hoey algorithm could be used to automatically detect self-intersections, and set the feature-level flag correspondingly. If doing this, remember that the simplification step (which runs prior to this) could either add or remove a self-intersection.
Holes are supported.
This pathway may be slower than the standard pathway, especially when used on a large scale but with simplification disabled, or used on an especially small scale.
It is intended for use when prior profiling indicates more performance is required after other methods are already in use.
Rarely, some visible artefacts may be introduced by the triangulation algorithm.
Use No/Thin Borders or Cheaper StrokeCaps/StrokeJoins (external)
To further improve performance, consider using no border, or a hairline 1px border (remembering to consider the difference between device and logical pixels). Alternatively, consider using StrokeCap.butt/StrokeCap.square & StrokeJoin.miter/StrokeJoin.bevel.
These are much cheaper for the rendering engine (particularly Skia), as it does not have to perform as many calculations.
You must comply with the appropriate restrictions and terms of service set by your tile server. Always read the ToS before using a tile server. Failure to do so may lead to any punishment, at the tile server's discretion.
This library and/or the creator(s) are not responsible for any violations you make using this package.
The OpenStreetMap Tile Server (as used below) ToS can be . Other servers may have different terms.
The basis of any map is a TileLayer, which displays square raster images in a continuous grid, sourced from the Internet or a local file system.
flutter_map supports WMS Usage, but most map tiles are accessed through Slippy Map/CARTO/XYZ URLs, as described here.
TileLayer(
  urlTemplate: 'https://tile.openstreetmap.org/{z}/{x}/{y}.png',
  userAgentPackageName: 'dev.fleaflet.flutter_map.example',
  // Plenty of other options available!
),
Recommended Setup
Although setting up a basic tile layer couldn't be simpler, it helps to spend a little bit more time fine-tuning it! We recommend covering this list at least, for every tile layer.
URL Template (required, except when using WMS)
Choose a suitable tile server for your app
userAgentPackageName
Always set userAgentPackageName, even though it is technically optional
If your tile server supports retina tiles natively, set up the retinaMode property
Especially on web, consider using this more advanced TileProvider to improve performance
Set the maximum zoom level that the tile server supports to prevent flutter_map from trying to exceed this (especially when not set appropriately in MapOptions.maxZoom)
If you need to squeeze out as much performance as possible, or you're noticing the tile loading seems a little slow:
Make sure the FlutterMap is rebuilt as few times as possible
Construct the TileProvider yourself, outside of the build method if possible, so it is reconstructed as few times as possible
Some tile providers may perform more expensive logic when they are constructed, and if the provider is frequently reconstructed, this can add up.
The URL template is a string that contains placeholders, which, when filled in, create a URL/URI to a specific tile.
Specifically, flutter_map supports the Slippy Map format, sometimes referred to as CARTO or Raster XYZ. Tiles are referred to by their zoom level, and position on the X & Y axis. For more information, read .
These templates are usually documented by your tile server, and will always include the following placeholders:
{x}: x axis coordinate
{y}: y axis coordinate
{z}: zoom level
Sometimes, they also include:
{s}:
{r}:
{d}:
Additional placeholders can also be added freely to the template, and are filled in with the specified values in additionalOptions. This can be used to easier add switchable styles or access tokens, for example.
Some tile servers provide mirrors/redirects of the main tile server on/via subdomains, such as 'a', 'b', 'c'.
These were necessary to bypass browsers' limitations on simultaneous HTTP connections, thus increasing the number of tiles that can load at once.
To use subdomains, add the {s} placeholder, and specify the available subdomains in TileLayer.subdomains. flutter_map will then fill the placeholder with one of these values based on internal logic.
Retina mode improves the resolution of map tiles, an effect particularly visible on high density (aka. retina) displays.
Raster map tiles can look especially pixelated on retina displays, so some servers support , which are tiles at twice the resolution of normal tiles.
Where the display is high density, and the server supports retina tiles - usually indicated by an {r} placeholder in the URL template - it is recommended to enable retina mode.
Note that where tiles are larger than the standard x256px (such as x512px), retina mode can help make them appear very similar to x256px tiles, but still retain the other benefits of larger tiles. In this case, consider fixing retinaMode to true, depending on your own tests. See for more information.
It's also possible to specify a fallbackUrl template, used if fetching a tile from the primary urlTemplate fails (which has the same format as this).
This parameter should be passed the application's package name, such as 'com.example.app'. This is important to avoid blocking by tile servers due to high-levels of unidentified traffic. If no value is passed, it defaults to 'unknown'.
This is then formatted into a 'User-Agent' header, and appended to the TileProvider's headers map, if it is not already present.
This is ignored on the web, where the 'User-Agent' header cannot be changed due to a limitation of Dart/browsers.
Need more control over how the URL template is interpreted and/or tiles are fetched? You'll need to change the TileProvider.
Some tile servers will use 512x512px tiles instead of 256x256px, such as Mapbox. Using these larger tiles can help reduce tile requests, and when combined with , it can give the same resolution.
To use these tiles, set tileSize to the actual dimensions of the tiles (otherwise they will appear to small), such as 512. Also set zoomOffset to the result of -((d/256) - 1) - ie. -1 for x512px tiles (otherwise they will appear at the wrong geographical locations).
The {d} placeholder/parameter may also be used in the URL to pass through the value of tileSize.
To make a more seamless experience, tiles outside the current viewable area can be 'preloaded', with the aim of minimizing the amount of non-tile space a user sees.
panBuffer sets the number of surrounding rows and columns around the viewable tiles that should be loaded, and defaults to 1.
A TileUpdateTransformer restricts and limits TileUpdateEvents (which are emitted 'by' MapEvents), which cause tiles to update.
For example, a transformer can delay (throttle or debounce) updates through one of the built-in transformers, or pause updates during an animation, or force updates even when a MapEvent wasn't emitted.
There are many independently maintained 'plugins' created by the 'flutter_map' community that give extra, prebuilt functionality, saving you even more time and potentially money.
Some pages in this documentation provide direct links to these plugins to make it easier for you to find a suitable plugin.
However, if you're just browsing, a full list is provided below (in no particular order), containing many of the available plugins. You can click on any of the tiles to visit its GitHub repo or pub.dev package.
Although these plugins have been checked by 'flutter_map' maintainers, we do not accept responsibility for any issues or threats posed by independently maintained plugins.
Use plugins at your own risk.
There is no guarantee that any of these plugins will support the latest version of flutter_map. Please remain patient with the plugin authors/owners.
Many plugins provide multiple methods to achieve similar goals. It is recommended to read the documentation of each potential plugin before using it in your project, as they might have slightly different feature sets or stability.
Tools
Additional Layers
To help choose between one of these plugins or a DIY solution, see:
If the TileProvider supports it (as NetworkTileProvider does), construct a single HTTP Client/HttpClient outside the build method and pass it to the tile provider - especially if you're unable to do the tip above
Using a single HTTP client allows the underlying socket connection to the tile server to remain open, even when tiles aren't loading. When tiles are loaded again, it's much faster to communicate over an open socket than opening a new one. In some cases, this can take hundreds of milliseconds off tile loading!
Reduce panBuffer to 0
This reduces the number of network requests made, which may make those requests that are made for more important tiles faster.
Main Parameters
URL Template
This parameter must be specified unless wmsOptions is specified.
Subdomains
Subdomains are now usually considered redundant due to the usage of HTTP/2 & HTTP/3 which don't have the same restrictions.
Usage of subdomains will also hinder Flutter's ability to cache tiles, potentially leading to increased tile requests and costs.
If the server supports HTTP/2 or HTTP/3 (how to check), avoid using subdomains.
Retina Mode
Therefore, where {r} is available, it is recommended to call the method RetinaMode.isHighDensity with the current BuildContext, and pass the result to TileLayer.retinaMode. This will enable retina mode on retina displays by filling the {r} placeholder with "@2x".
It is also possible to emulate retina mode, even when the server does not natively support it. If retinaMode is true, and no {r} placeholder is present, flutter_map will emulate it by requesting four tiles at a larger zoom level and combining them together in place of one.
Emulating retina mode has multiple negative effects:
it increases tile requests
it likely causes text/labels and POI markers embedded in the tiles to become smaller and unreadable
it decreases the effective maximum zoom by 1
Therefore, carefully consider whether emulating retina mode is appropriate for your application, and disable it if necessary. Always prefer native retina tiles if they are available.
Fallback URL Template
Specifying a fallbackUrl does have negative effects on performance and efficiency. Avoid specifying fallbackUrl unless necessary.
See in-code documentation and Tile Providers for more information.
Some TileProviders may not support/provide any functionality for fallbackUrl template.
userAgentPackageName
Although it is programatically optional, always specify the userAgentPackageName argument to avoid being blocked by your tile server.
Tile Providers
If a large proportion of your users use the web platform, it is preferable to use CancellableNetworkTileProvider, instead of the default NetworkTileProvider. It may also be beneficial to use this tile provider on other platforms as well.
Specifying a panBuffer too high may result in slower tile requests for all tiles (including those that are visible), and a higher load on the tile sever. The effect is amplified on larger map dimensions/screen sizes.
Tile Update Transformers
TileUpdateTransformer(s) is a power-user feature. Most applications won't require it.


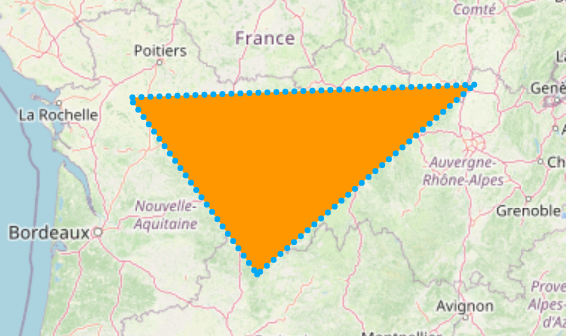
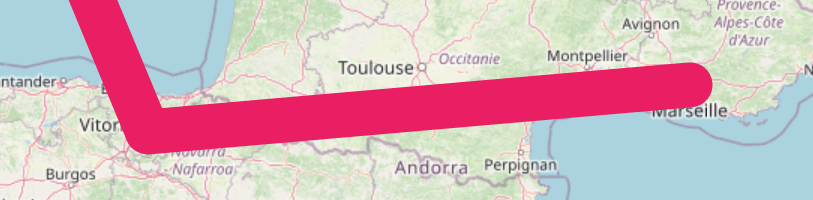


